

How to attach the Powerchair Mitt
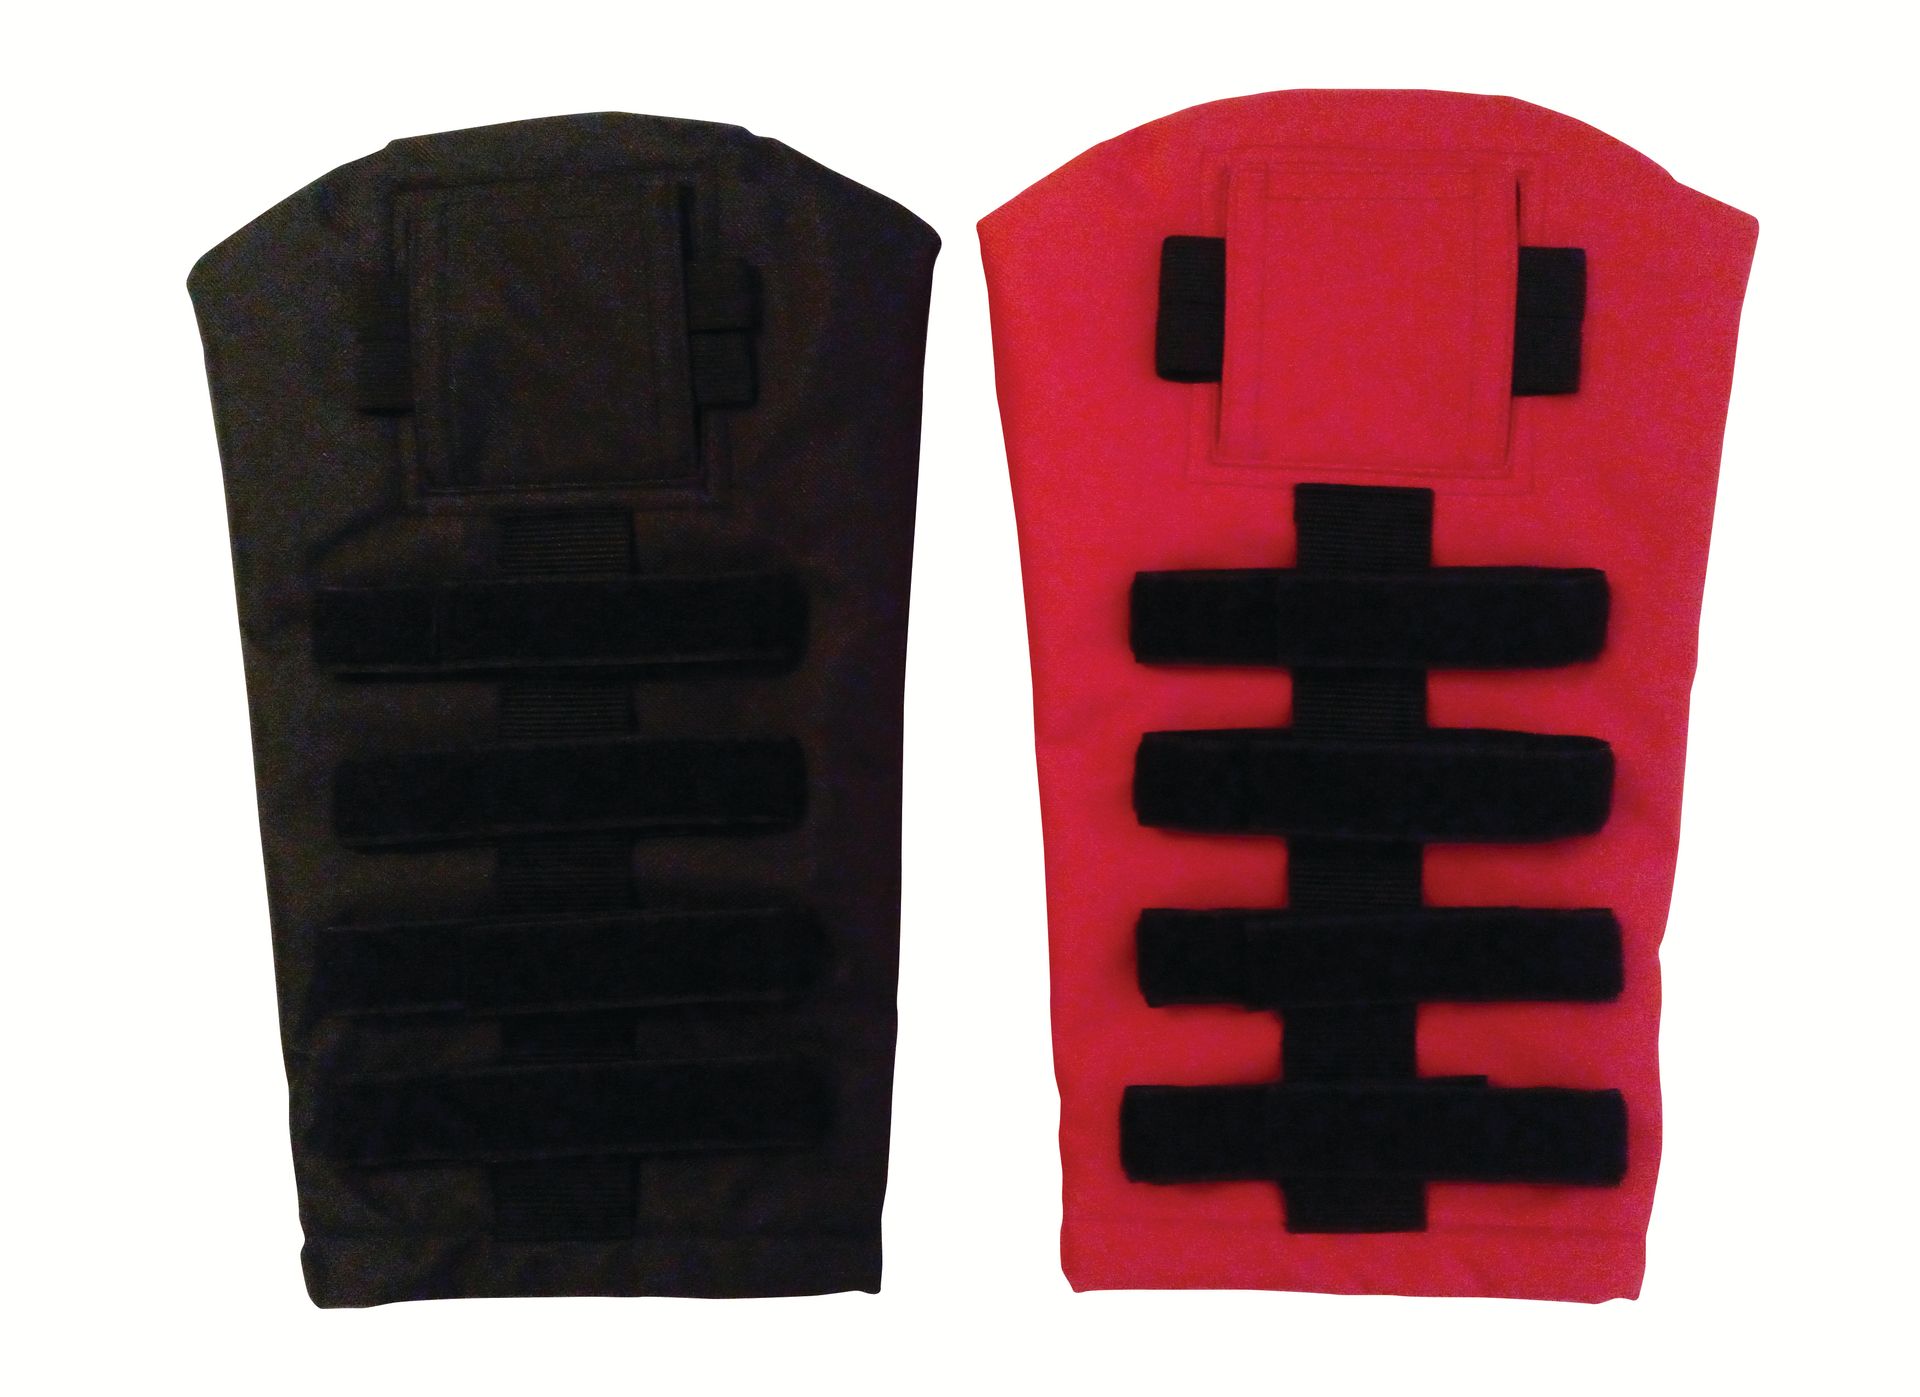
FIGURE A

FIGURE B

SAFETY INFORMATION
Please make sure Powerchair is off when assembling and removing the Powerchair Mitt.
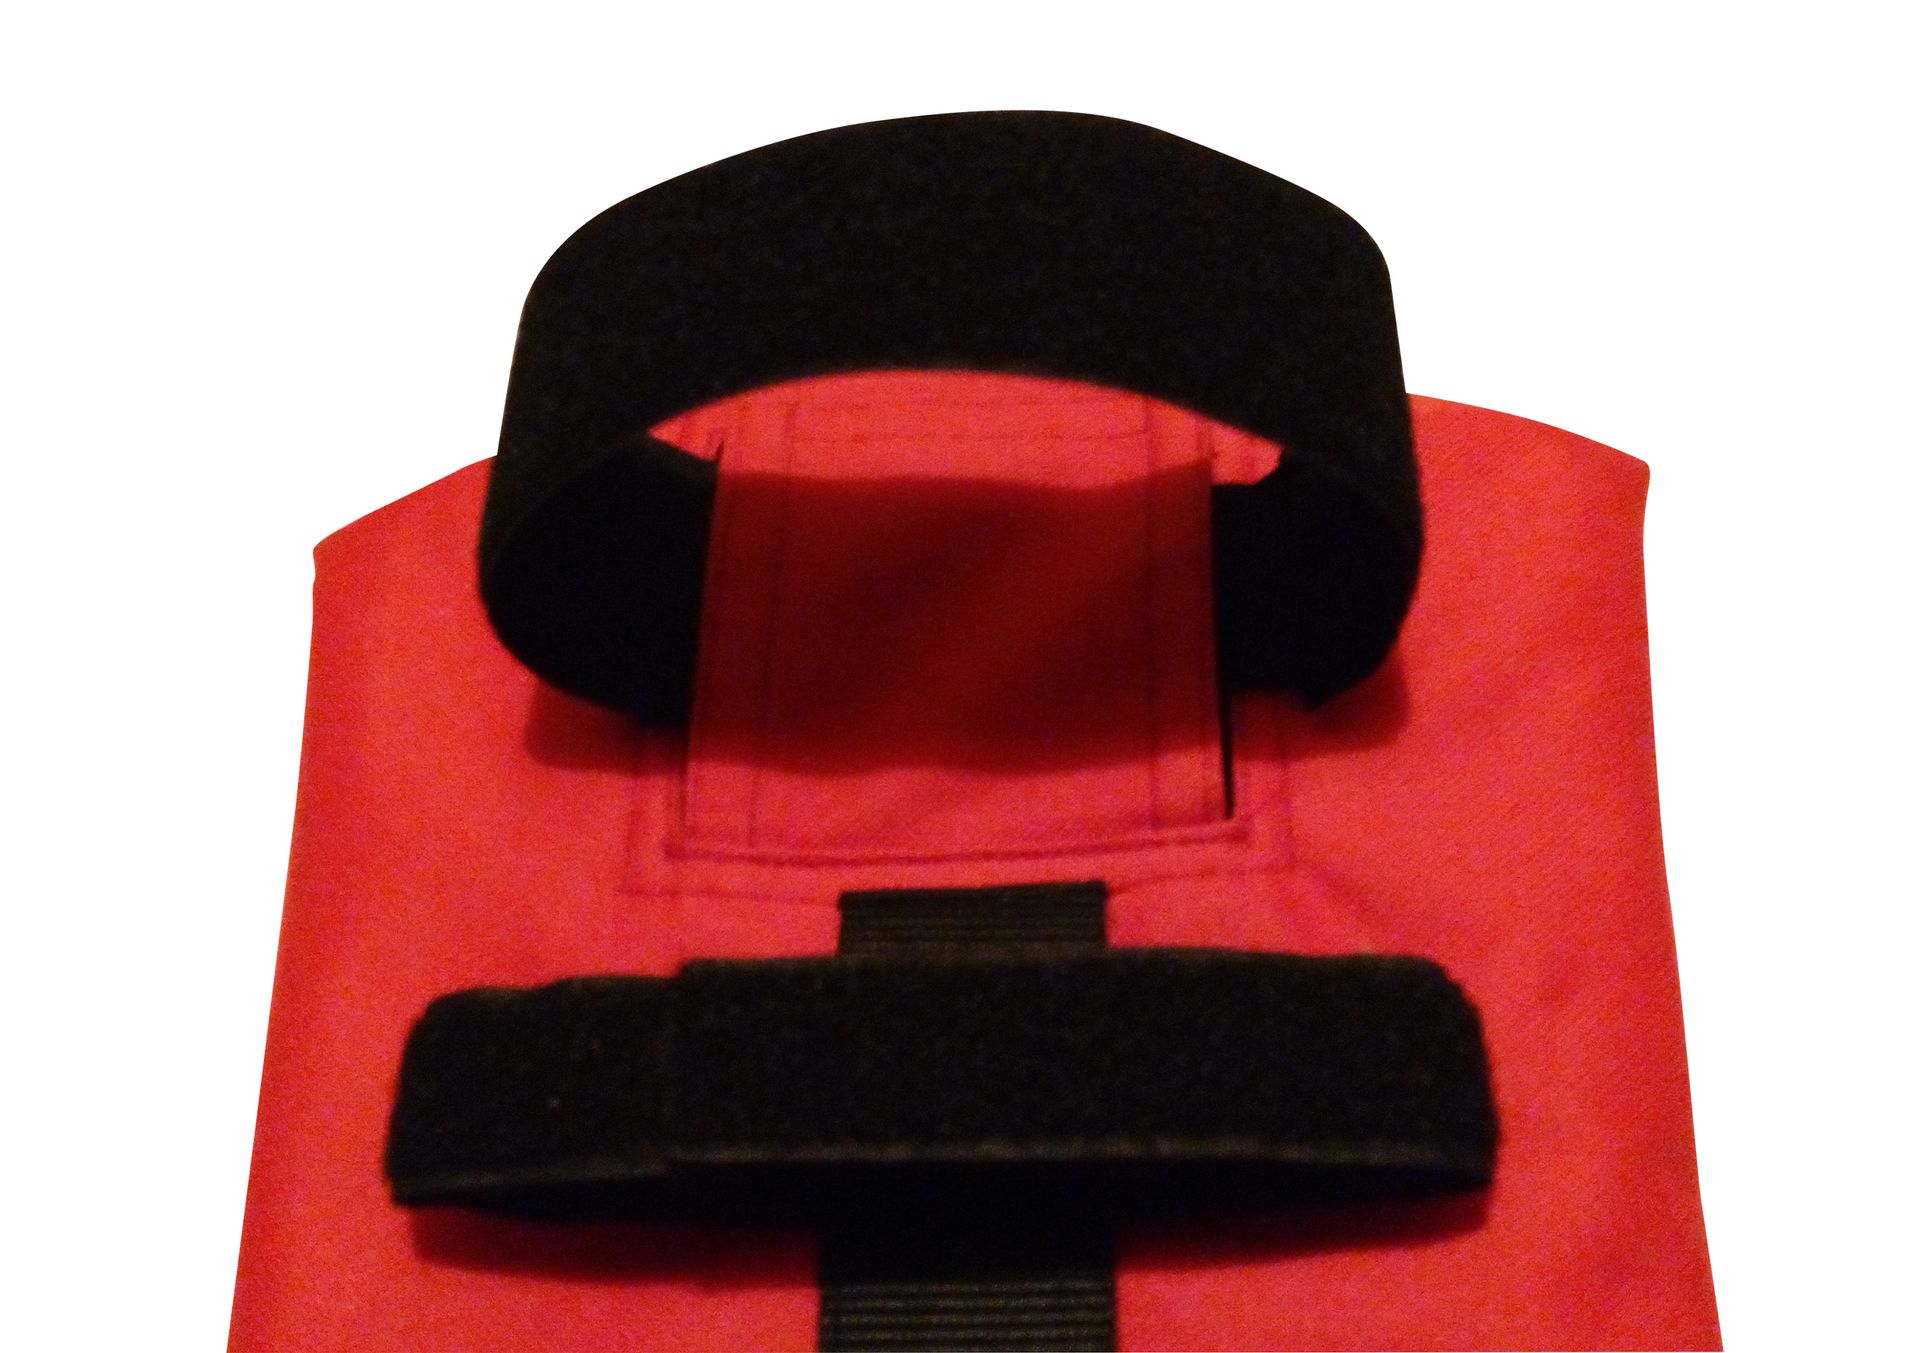
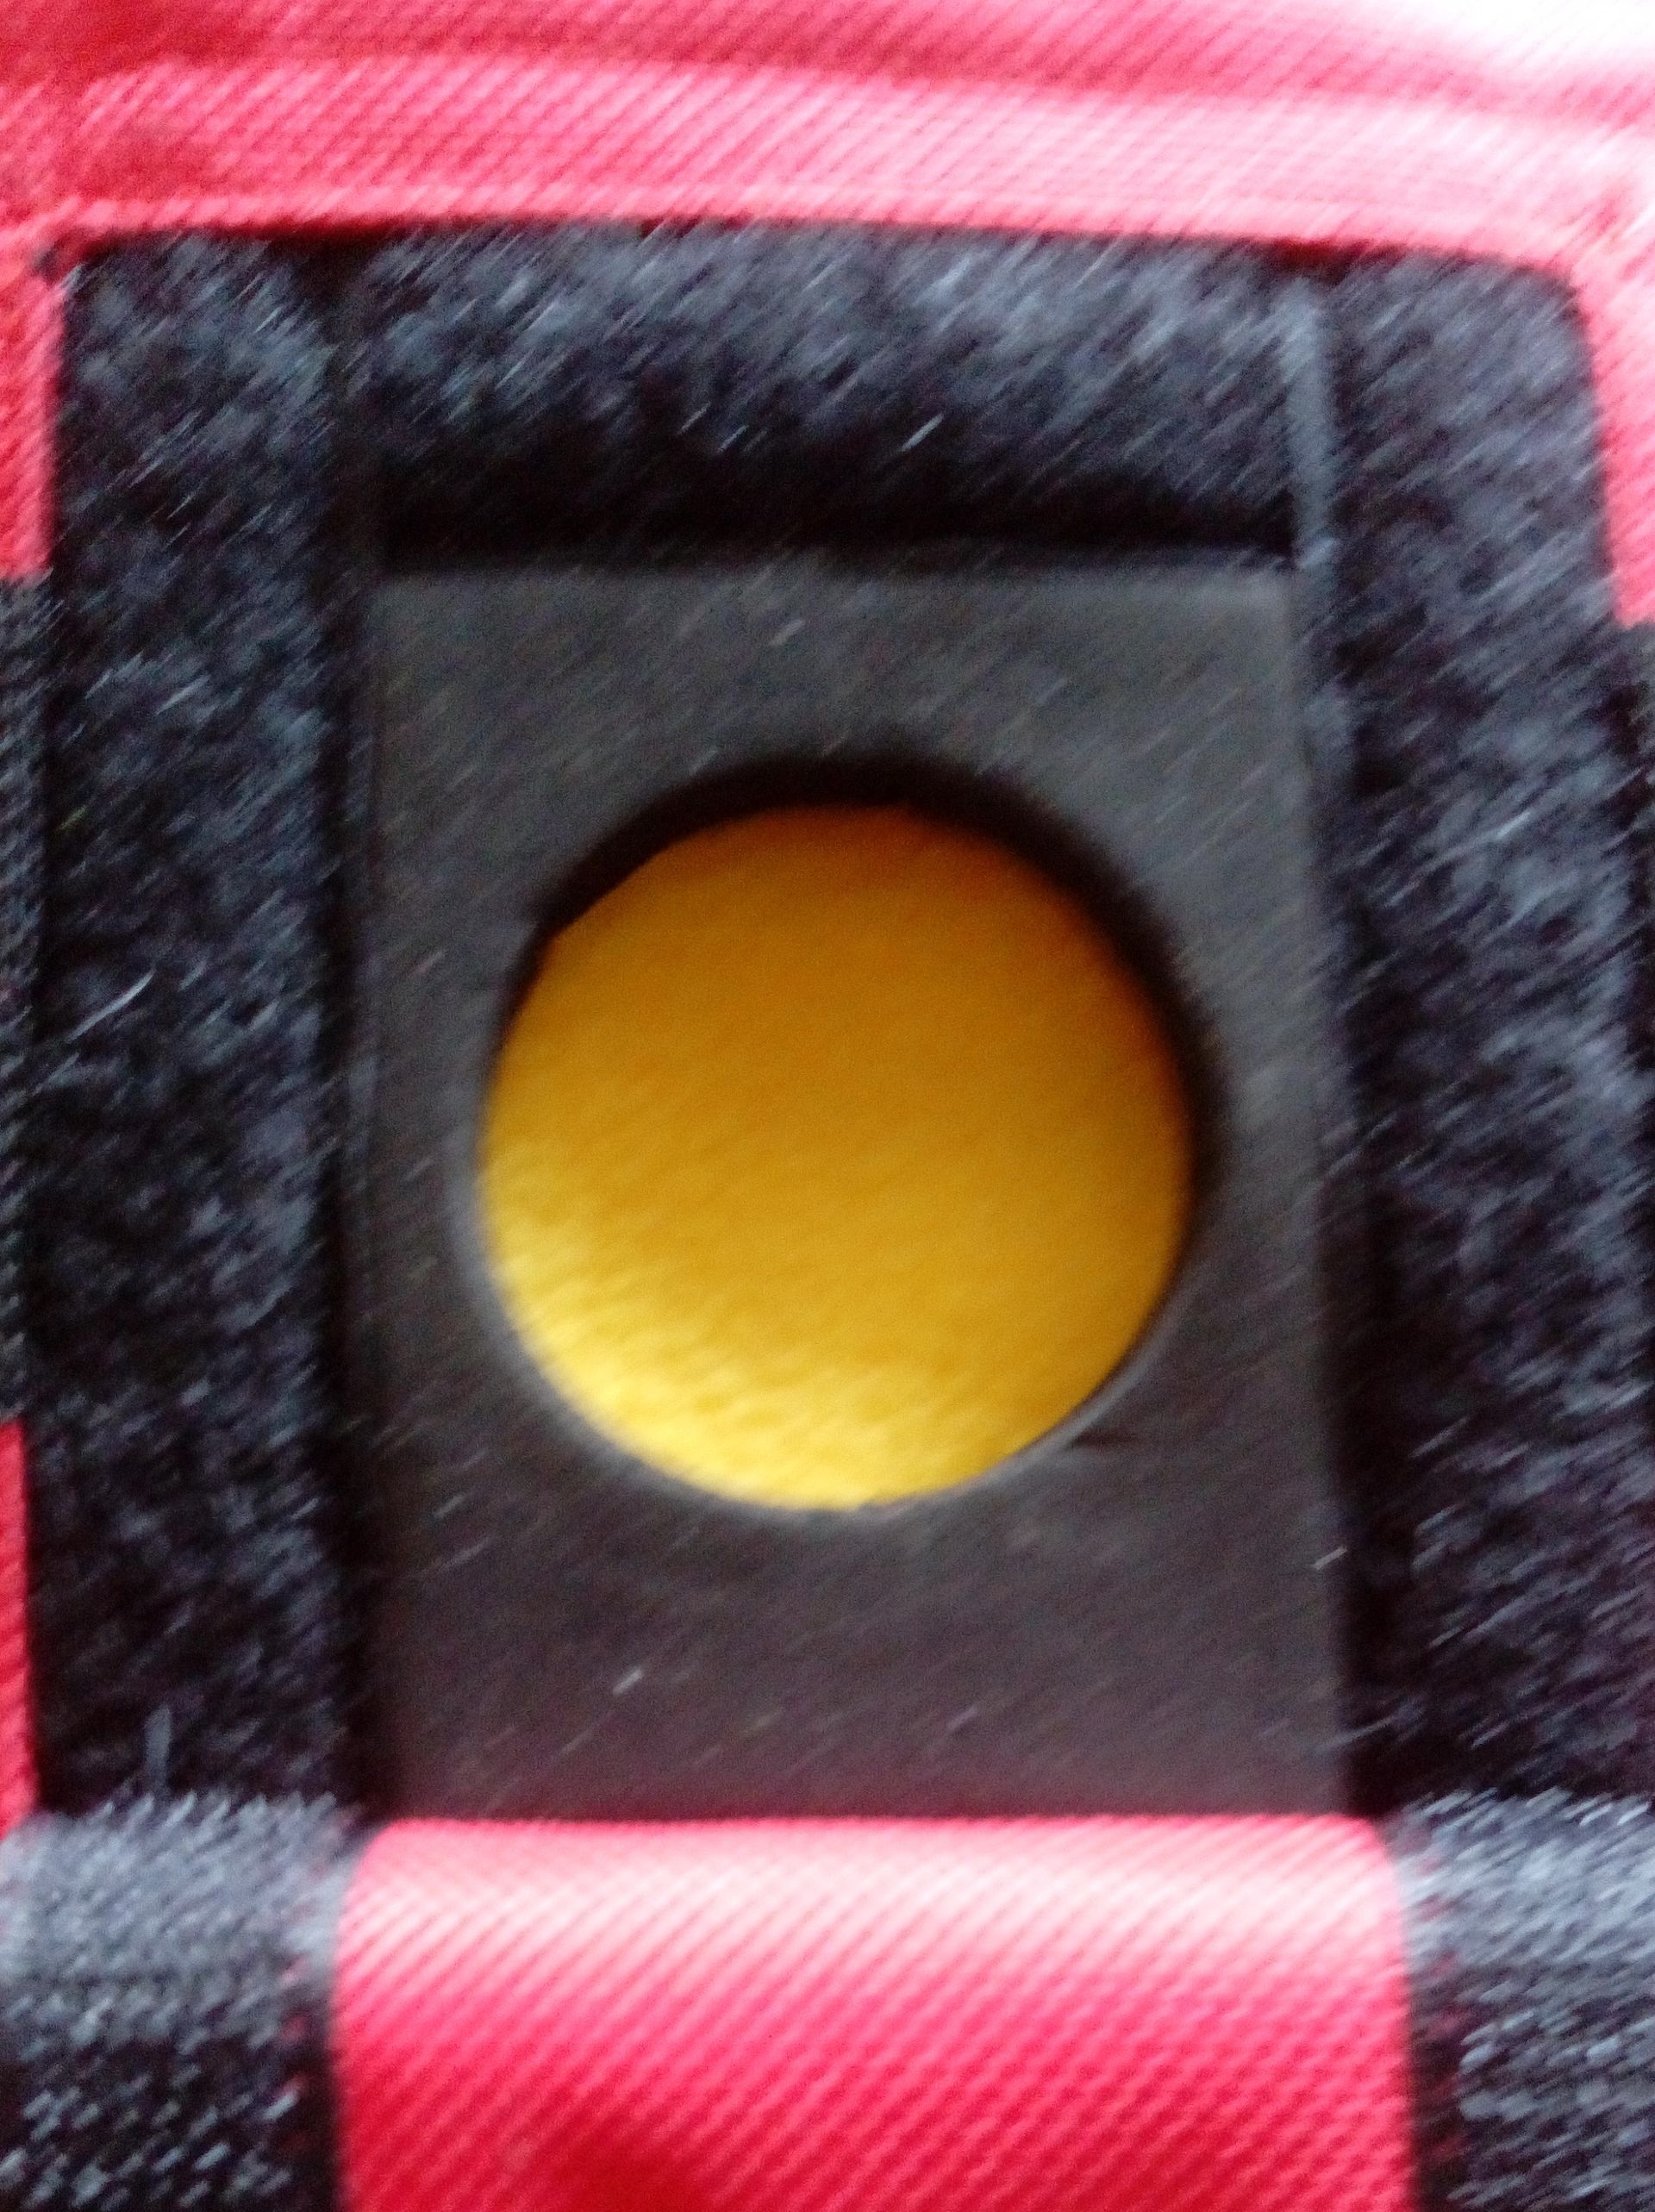
To attach the Powerchair Mitt to the control panel first make sure that flap (A) is in the open position
(FIG A) and unfasten
velcro strap (D). Using your fingers through the yellow inner aperture carefully slide elasticated aperture (B) of the mitt down over control joystick (C) and its rubber base. Do the same for the yellow inner aperture.
Refasten the velcro strap underneath the control panel (E) to compress the mitt aperture down around the joystick sealing it from the elements (FIG B).
Original Powerchair Mitt (velcro D Strap)
ALTERNATE MITT VERSION
If you prefer the alternate mitt version simply stretch elasticated D bands under control panel when lowering mitt aperture onto joystick.
These two bands can be used independent of each other helping to give a wider range of attachment possibilities or convert to one band using the Velcro patch supplied. (See FIG C and FIG D)
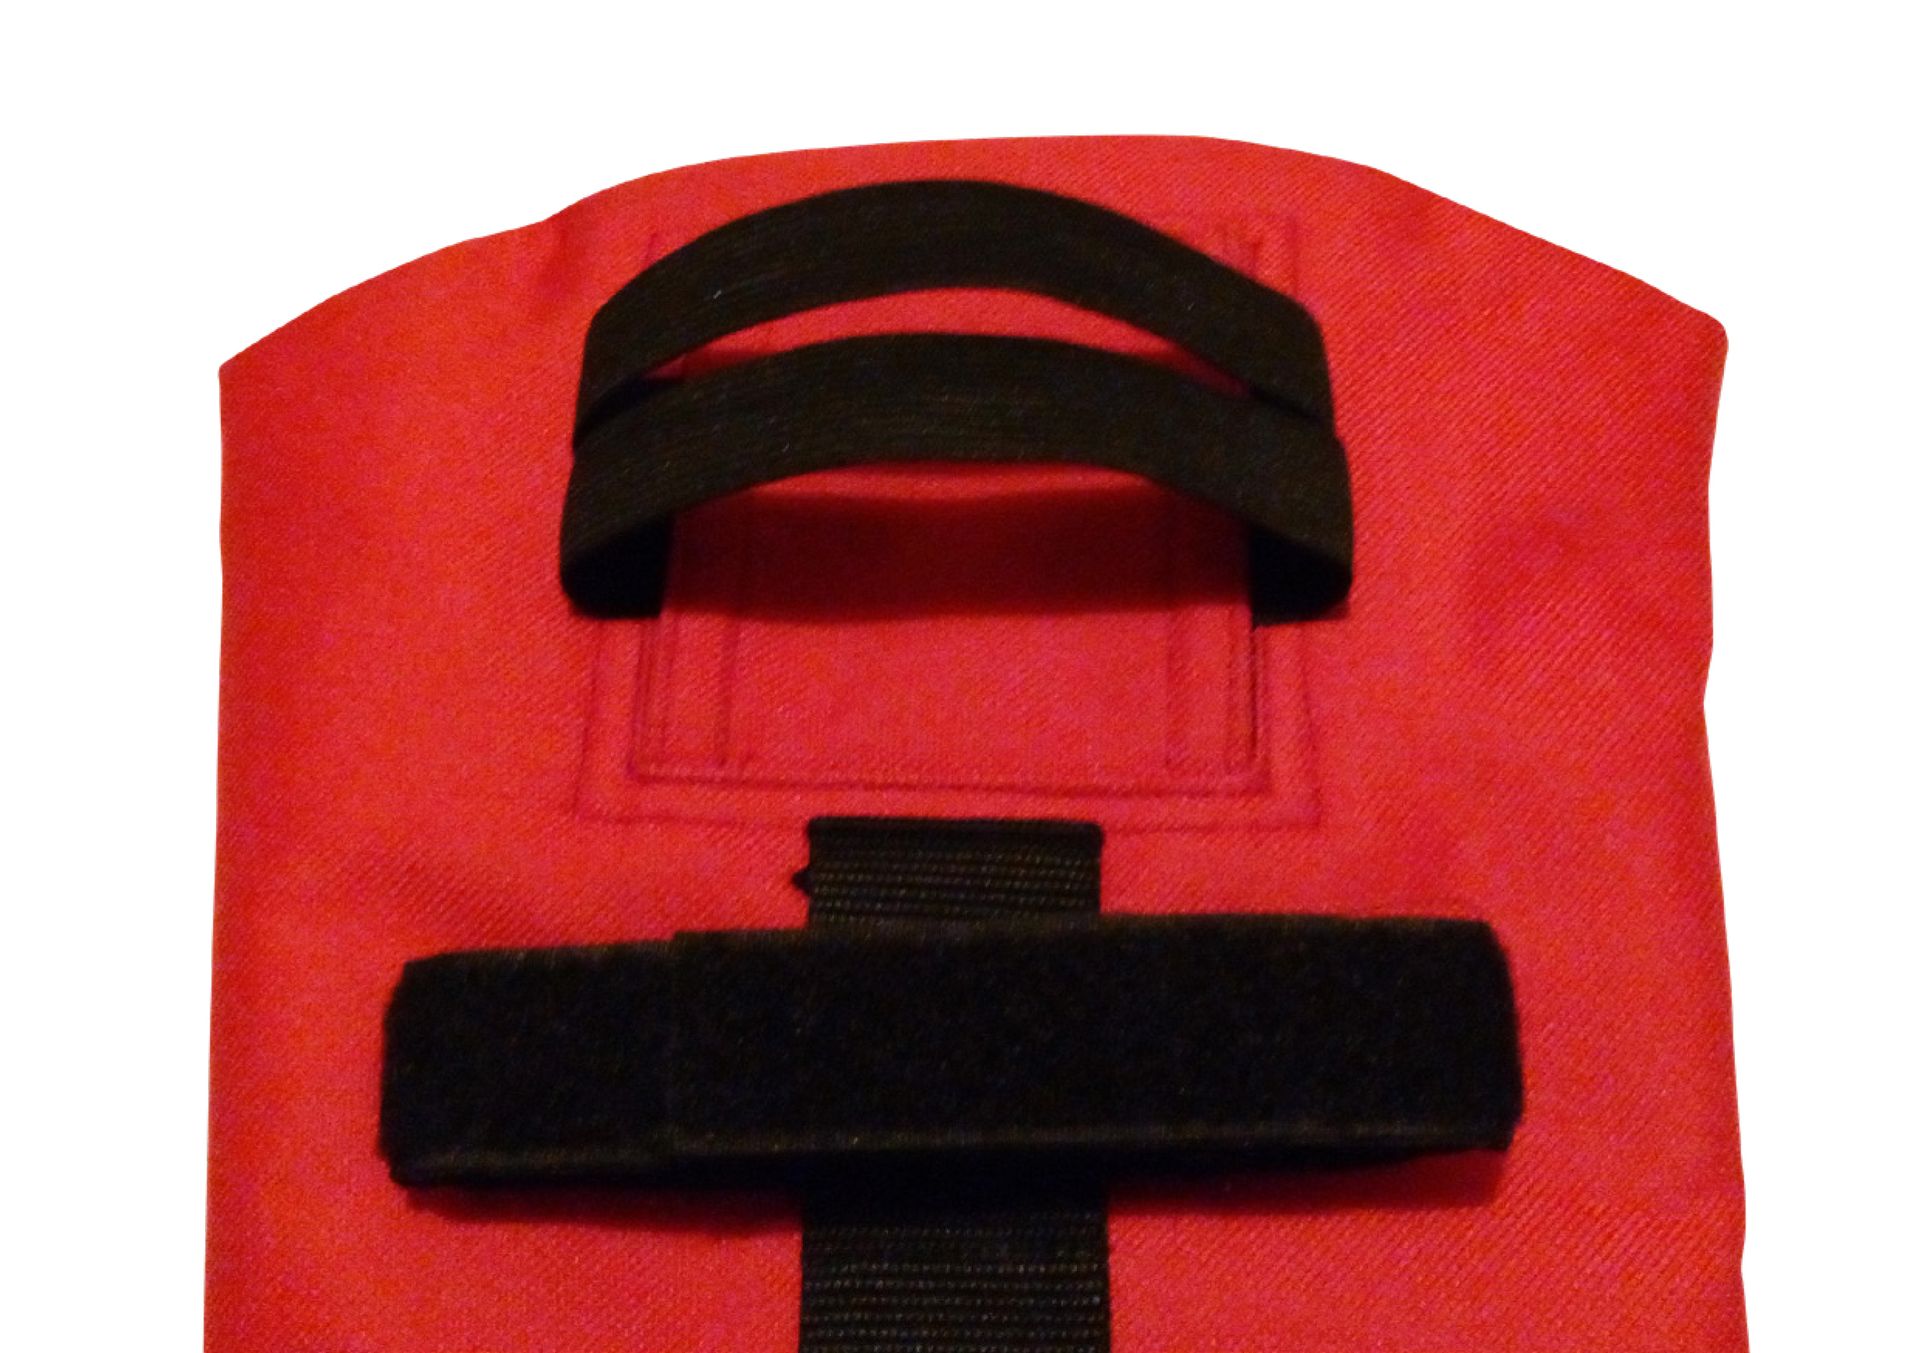
FIG C Alternate Mitt version (elasticated D Bands)
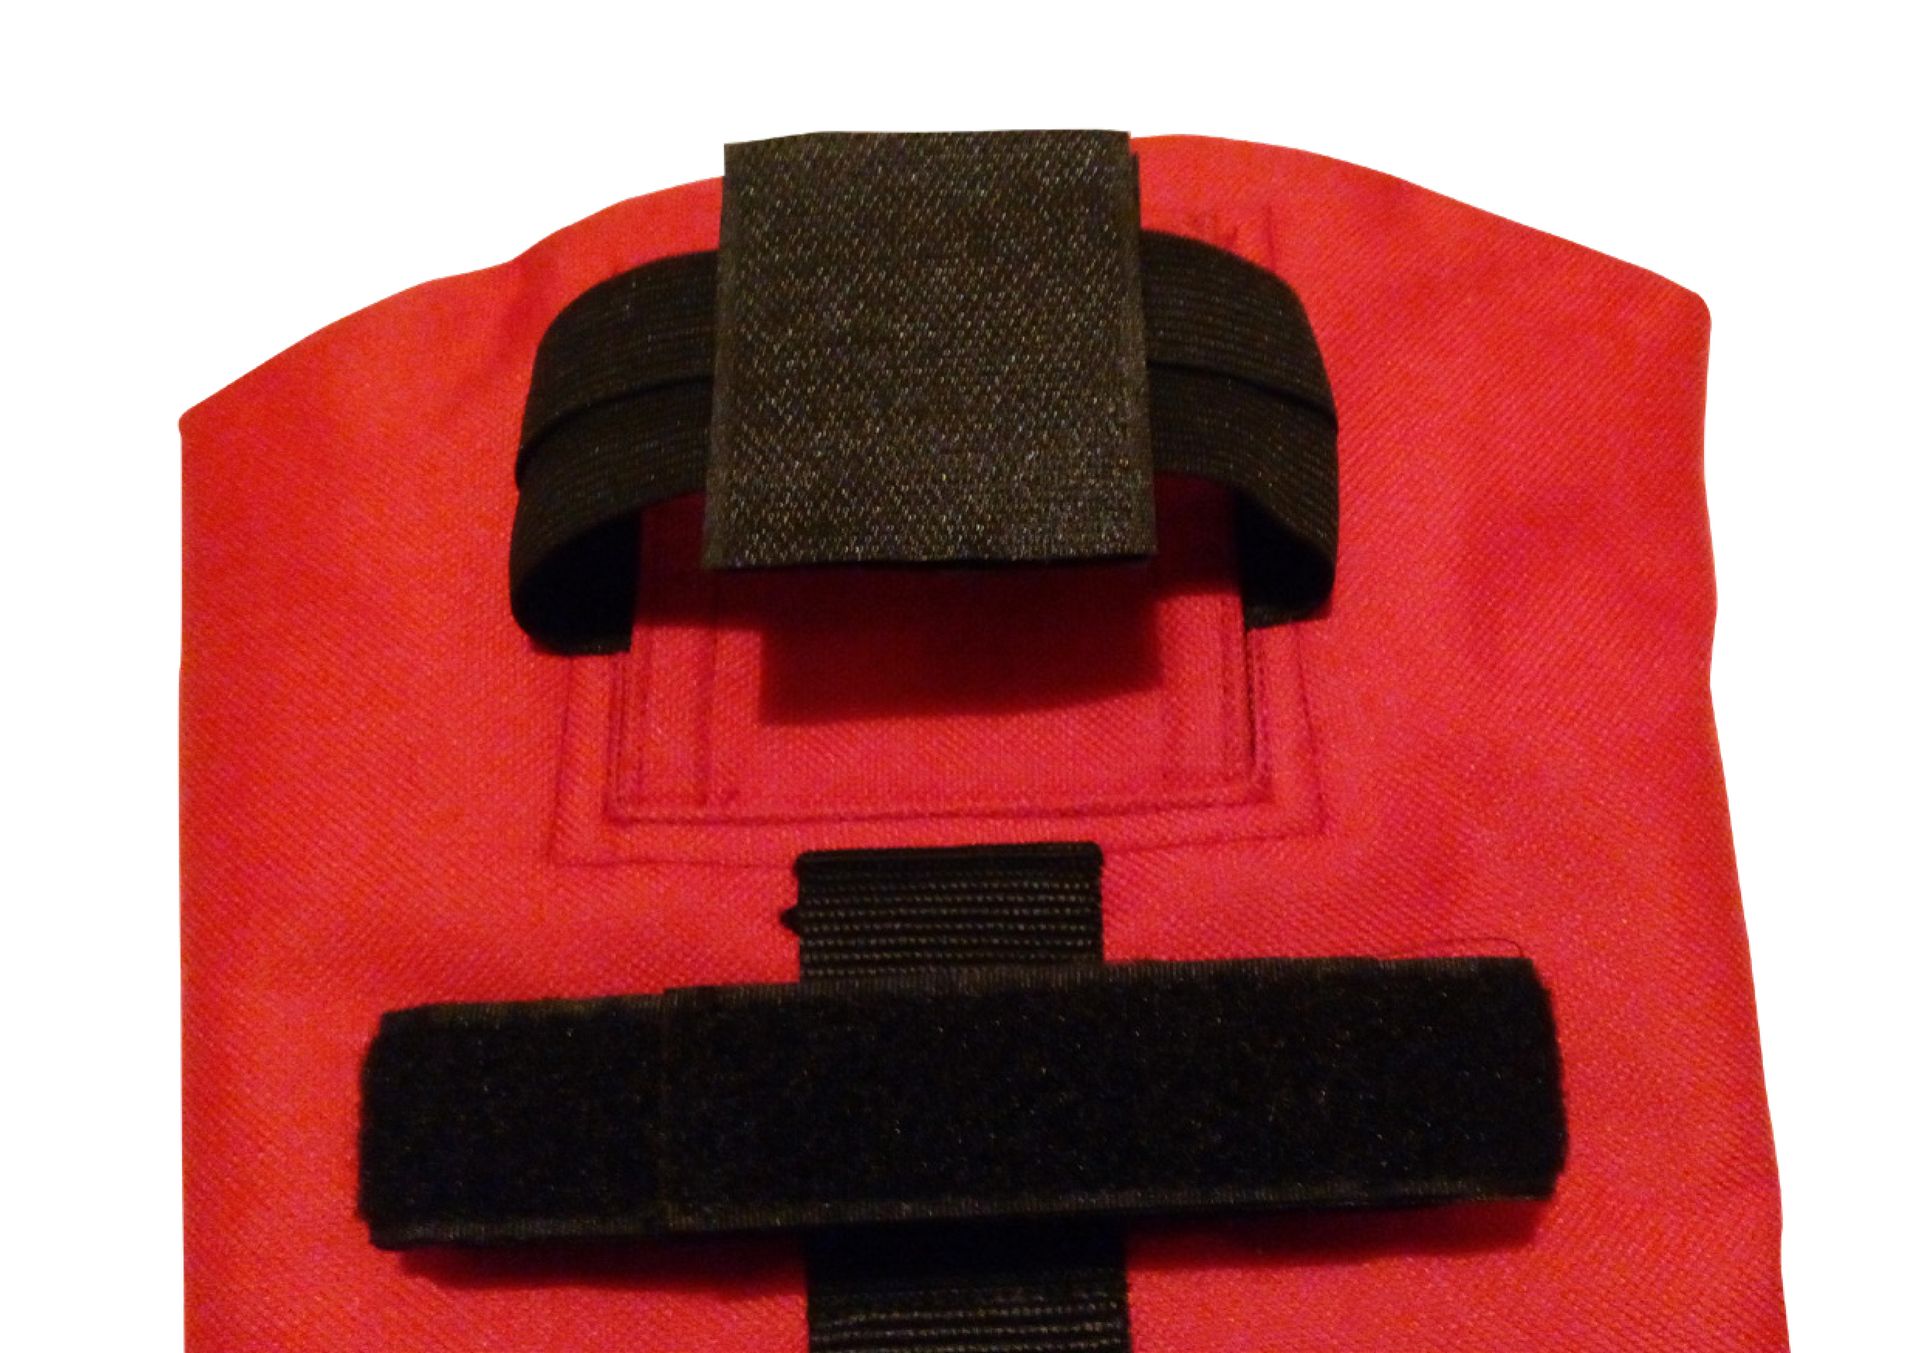
FIG D Bands converted to one using Velcro patch
Both the ORIGINAL POWERCHAIR VELCRO MITT and the ALTERNATE ELASTICATED BAND MITT come supplied with an additional hook and loop strap 5cm x 22cm. If needed these additional straps will give the mitt greater attachment possibilities to the control panel.
For the ORIGINAL VELCRO MITT these straps can be cut and attached to Velcro strap (D).
For ALTERNATE ELASTICATED BAND MITT the straps can be cut and sewn to the elasticated bands (D).
PLEASE NOTE. All cutting and sewing must be undertaken by a qualified person.
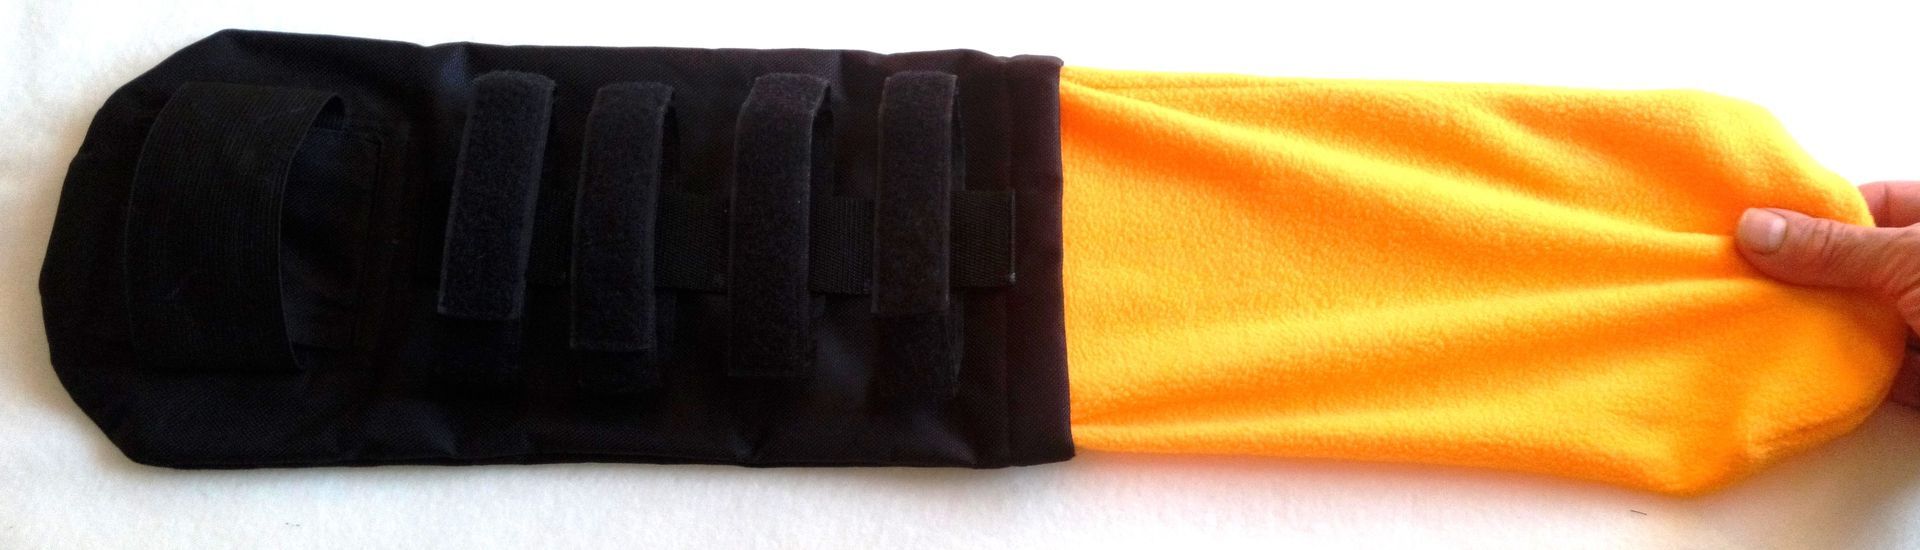
ELASTICATED APERTURE B
- Aperture can easily stretch to over 4cm Diameter
- Can easily be cut or completely removed if needed
- Aperture on Alternate mitt (Combination pack) pre cut to accommodate smaller/difficult and unconventional joysticks and control panels
To attach the Powerchair Mitt to the control arm unfasten velcro straps (F) and rest the body of the mitt on the control arm (G) and refasten the velcro straps around the control arm (FIG B). Any of the velcro straps can easily be removed and can attach to each other if needed to accommodate the various types of powerchair arm framework.
If the control panel (E) has to be set further away from the control arm (G) (due to the users arm length). Keeping the front of the mitt attached to control panel (E) unfasten all the velcro straps (F), adjust the control panel to the required distance away from the control arm and refasten the velcro straps, again if needed certain velcro straps can be removed to accommodate the new “set” position, any velcro strap(s) that fall in the space between the control arm and the control panel due to the new set position can be completely removed to avoid a snag hazard (example FIG B strap F1).
IMPORTANT SAFETY INFORMATION
The Powerchair Mitt has been designed to attached itself to most powerchairs especially those where the control panel is on or near the same level as the control arm allowing the users hand to have a straight and clean entry / withdraw to and from the mitt (see FIG B).
If the control panel is much higher or lower than the chair arm it can make the hand entry and withdraw more difficult causing problems for the user.
PLEASE NOTE the Powerchair Mitt may not fit all powerchairs.
It is the responsibility of the User or that of a carer / P.A to ensure the compatibility of the Powerchair Mitt. If the User does not feel comfortable and safe DO NOT USE and return the Powerchair Mitt in the condition sent to you for a full refund (UK ONLY).
ALL POWERCHAIR MITT DESIGNS ARE PATENT AND REGISTERED DESIGN PROTECTED
If you know of any person or company infringing these rights please contact me so that I can take the appropriate legal action(s). Thank you.